|
|
Floor Plan Your Classroom |
|||
| Floor Plan Your Classroom | Gallery | Resources | More 'Architivities' | Contact Information |
|---|---|---|---|---|
Draft a CAD Drawing using MS PowerPoint 2010 for Windows
|
|
Floor Plan Your Classroom |
|||
| Floor Plan Your Classroom | Gallery | Resources | More 'Architivities' | Contact Information |
|---|---|---|---|---|
Draft a CAD Drawing using MS PowerPoint 2010 for Windows
| Start Microsoft PowerPoint and go to File->Save As.. to save it immediately. Remember to save your work every two minutes. OR Download a PowerPoint graph paper
template in 1/4" scale. |
|
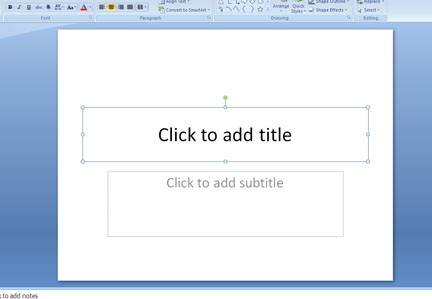
Double click on the border of the text box that reads "Click to add title." When it is selected, use the backspace key on the keyboard to delete it. Do the same with the "Click to add subtitle" text box. |
 |
Check the Ruler button from the View tab at the top of the screen (if it is not already in view). Also check the Gridlines button. This adds a background grid to the screen that lines and shapes will snap to to make them lined up neatly.
|
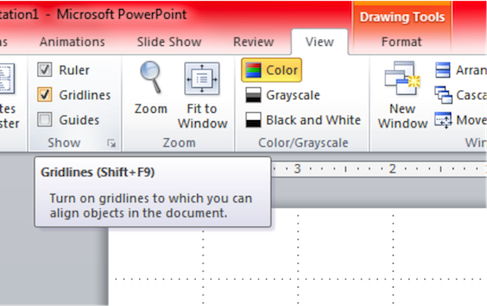 |
Then, click the little, boxed arrow to the right of the word Show. This brings up the Grid and Guides dialog box. Set the Spacing for 0.25 Inches (1/4 inch), which is the preferred size for making floorplans to scale. Display grid on screen should be checked. |
|
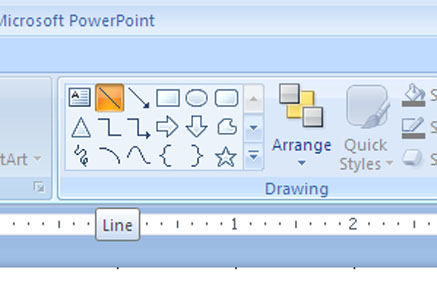
| To draw walls: Select the line tool from the Drawing section. Drag a line in the document to create straight walls and windows. Keep lines straight by holding down the shift key on the keyboard while you drag a line. |
 |
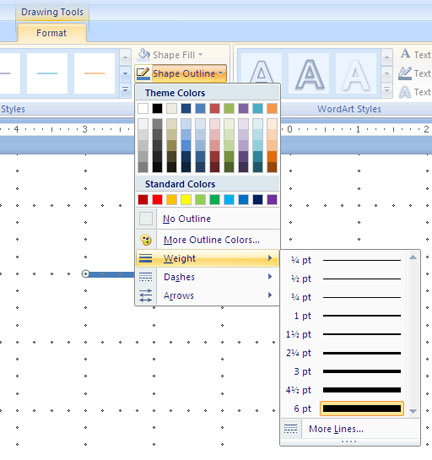
| To change the thickness of the line, do one of two things:
Suggestion: Adjust the width of the line to 6 pt for walls and 3 pt for windows. Remember to draw in scale, using the top and side rulers as guides. For example, your scale may be 1/4" scale (that means that 1 foot in the real world equals 1/4 inch on the computer). Since your grid spacing is set to 1/4 inch, all you have to do is drag your line however many spaces you need it to be, with each grid-space equal to 1foot. |
|
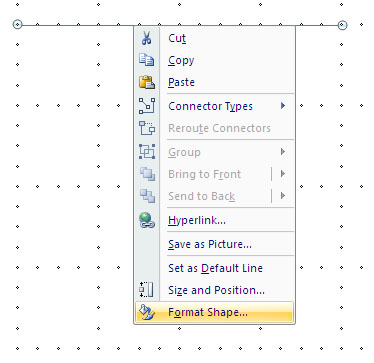
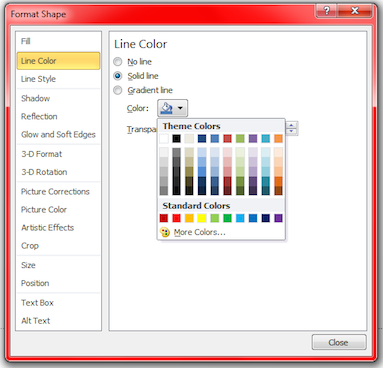
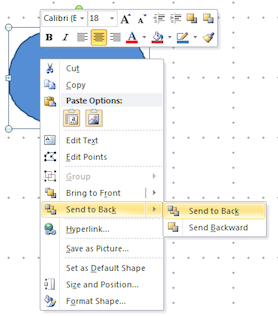
If you wish to change the color (or other aspects) of the line,
|
|
| If you have been working only with the line tool, and you wish to fill in an area with color or texture (to create a floor carpet for example),
|
|
| To create curved lines, use the Scribble tool from the Drawing section. |
|
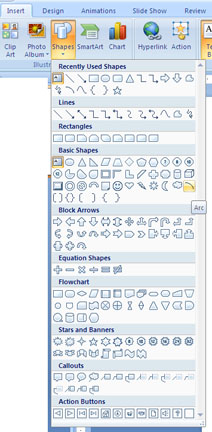
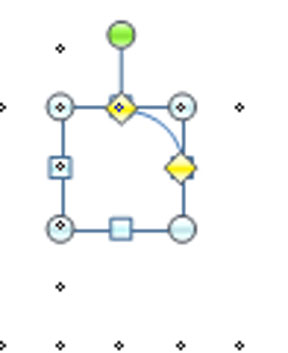
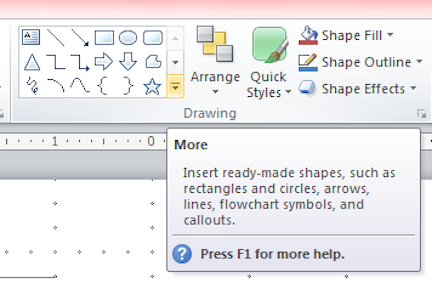
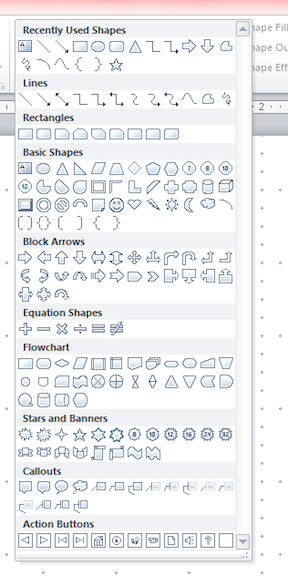
Other useful shapes (like the Arc tool, used for showing which way a door opens) can be accessed also from the Drawing tab. Arcs can be changed by adjusting the yellow diamonds after they are selected. Arcs (and other ready-made shapes) can be accessed by clicking the little downward-pointing More arrow in the side of the box of shapes. This opens a long box of shapes, most of which are not quite right for floor plans.
OR Get shapes from the Shapes menu in the Insert tab. |
|
| After drafting the walls and windows, doors and closets to scale, add dimension lines. Try to draw the dimension lines outside of the floor plan of the room. Use a very thin line width (such as 1 pt) and choose arrow heads for the line style. |
 |
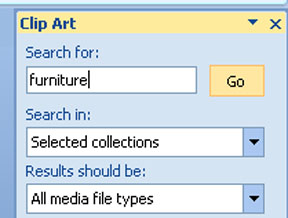
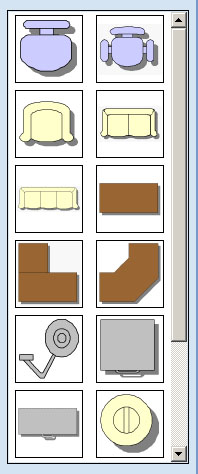
| Use the Shapes and drawing tools to create your own furniture. Make sure your furniture is to scale and is in proportion to your floor plan. Also make sure it is in the "from the ceiling looking down" (that is, floor plan) view. OR To insert clip art of furniture choose Clip Art from the Insert tab. A Search box will appear on the side of the screen. Suggested categories to search for include "furniture" and "office layout."
|
|
The results will appear in the same side panel. To insert an image into the floor plan, either
Make sure that the furniture is in "floor plan view." That is, make sure it appears as if it were flat, with the viewer looking down from above.
|
 |
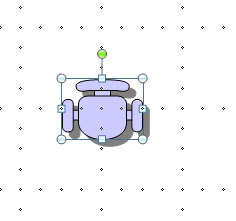
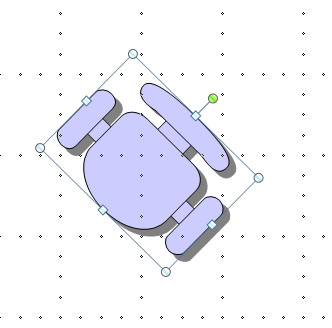
After furniture is added to the floor plan, it can be resized or rotated. For example, to rotate and resize a chair,
The image to the bottom right is the resized and rotated chair from above right. |
|
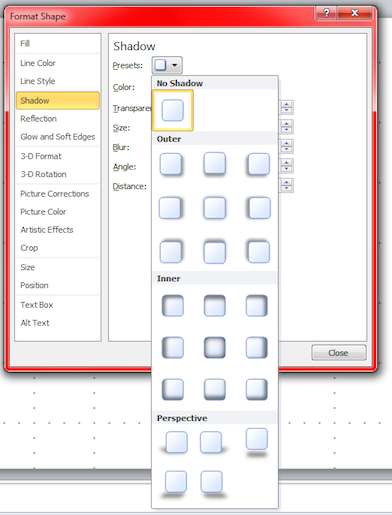
| The furniture clip art may have a built-in shadow. To remove it,
|
 |
Use the Text Box tool from the Insert tab to add text. Create a text box for the key, the scale, descriptions of furniture, and the total area of the room. Also use text boxes in your dimension lines to show the length of the walls on the dimension lines. Double-click on a text box to customize it. |
|
| Math-Kitecture Home | Floor Plan Your Classroom | Gallery | Resources | Teacher's Notes | More Architivities | Contact Information |